


Homeschooling asks a lot of you—teaching, managing the day-to-day, and somehow keeping the laundry moving. You want to support your child’s growth, build their independence, and maybe not spend every evening buried in Pinterest printables.
That’s where task boxes come in. 🎯
Task boxes are bite-sized, skill-building activities your child can complete independently—giving you a breather and them a confidence boost.
Whether you’re brand new to homeschooling or just tired of the endless “what should we work on today?” shuffle, this guide will walk you through exactly how to start a task box system at home—without overwhelm, perfectionism, or needing a label maker (unless that’s your thing!).
Think of a task box as a mini activity with a clear start and finish. It focuses on one skill—like sorting, matching, counting, or sequencing—and is designed to be completed independently.
Task boxes are:
And best of all? They help your child feel capable. You’ll see confidence skyrocket when your learner finishes an activity on their own.
Here’s what a task box system can do for your homeschool life:
For your child:
For you:
Don’t worry—we’re not starting from scratch. You likely have more resources at home than you realize.
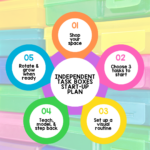
Here’s your simple 5-step independent work starter plan:
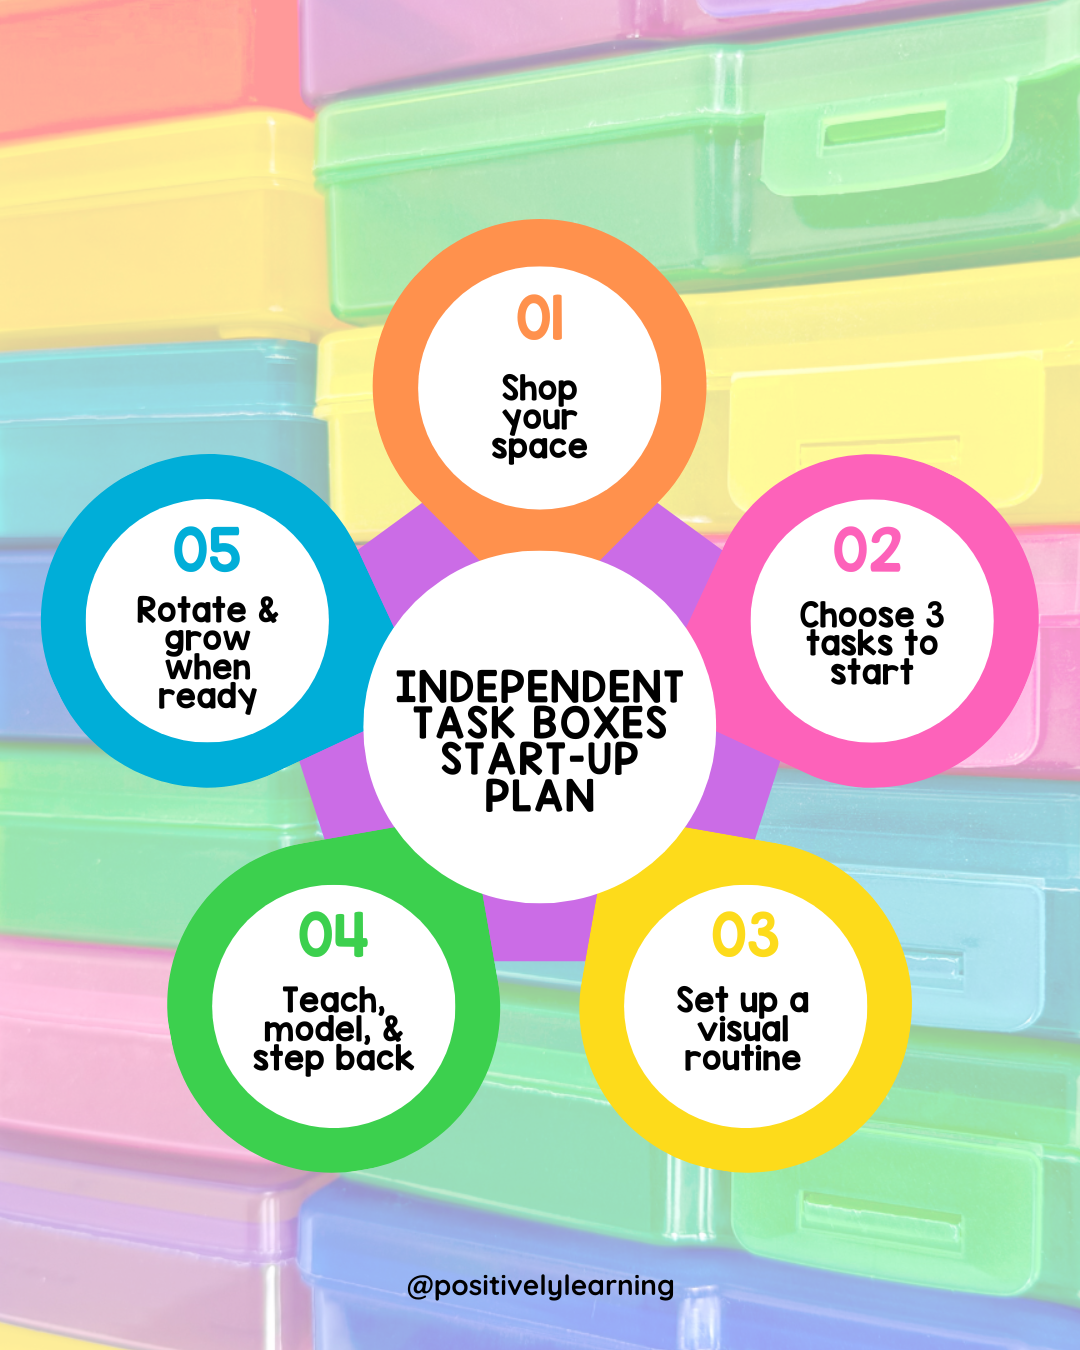
1. Shop your space 🛒
Grab a bin, basket, drawer—anything! Then take inventory of what you already have:
🧩 puzzles
🖍️ crayons and pre-cut shapes
🧦 unmatched socks (hello, sorting game!)
🍴 plastic utensils for “set the table” life skills
2. Choose 3 tasks to begin
We’re going for progress, not perfection. Pick three activities your child can complete with minimal help. These can be:
3. Set up a visual routine
Consistency is key. Use a simple checklist, token board, or even a row of bins to help your child see what’s expected. “First this, then that” goes a long way in creating independence.
4. Teach, model, and step back
Introduce each task one at a time. Show how it’s done, then let your child try. Gradually reduce how much you help until they can complete it solo.
5. Rotate and grow as needed
Once the routine is rolling, swap out tasks weekly or monthly. You can add skills, increase complexity, or even include seasonal themes if that’s your jam.
(P.S. Want the guesswork gone? The Task Box Dollar Club has hundreds of print-and-go tasks ready for you!)
You don’t need a fancy system or a laminator to make this work. You just need one task your child can complete without you—and the confidence to let them try.
Start small. Stay consistent. And celebrate every win. 🎉
Because your child can work independently. And you can homeschool without doing everything yourself.
Let’s make it happen—one task box at a time.

|

|

|